Last time we went through the initial steps of using Ableton Live to host a bass guitar channel strip, for live performance and recording. We’re going to finish that now, and hopefully end up with a fully self-contained setup that we can recall and even migrate between devices.
Build an Ableton Live Bass Rig – Part 2
STEPS 9-16
9 Now we come to the part where it gets really personal, as we add some audio effects, which is where it’s really going to be different for everybody.
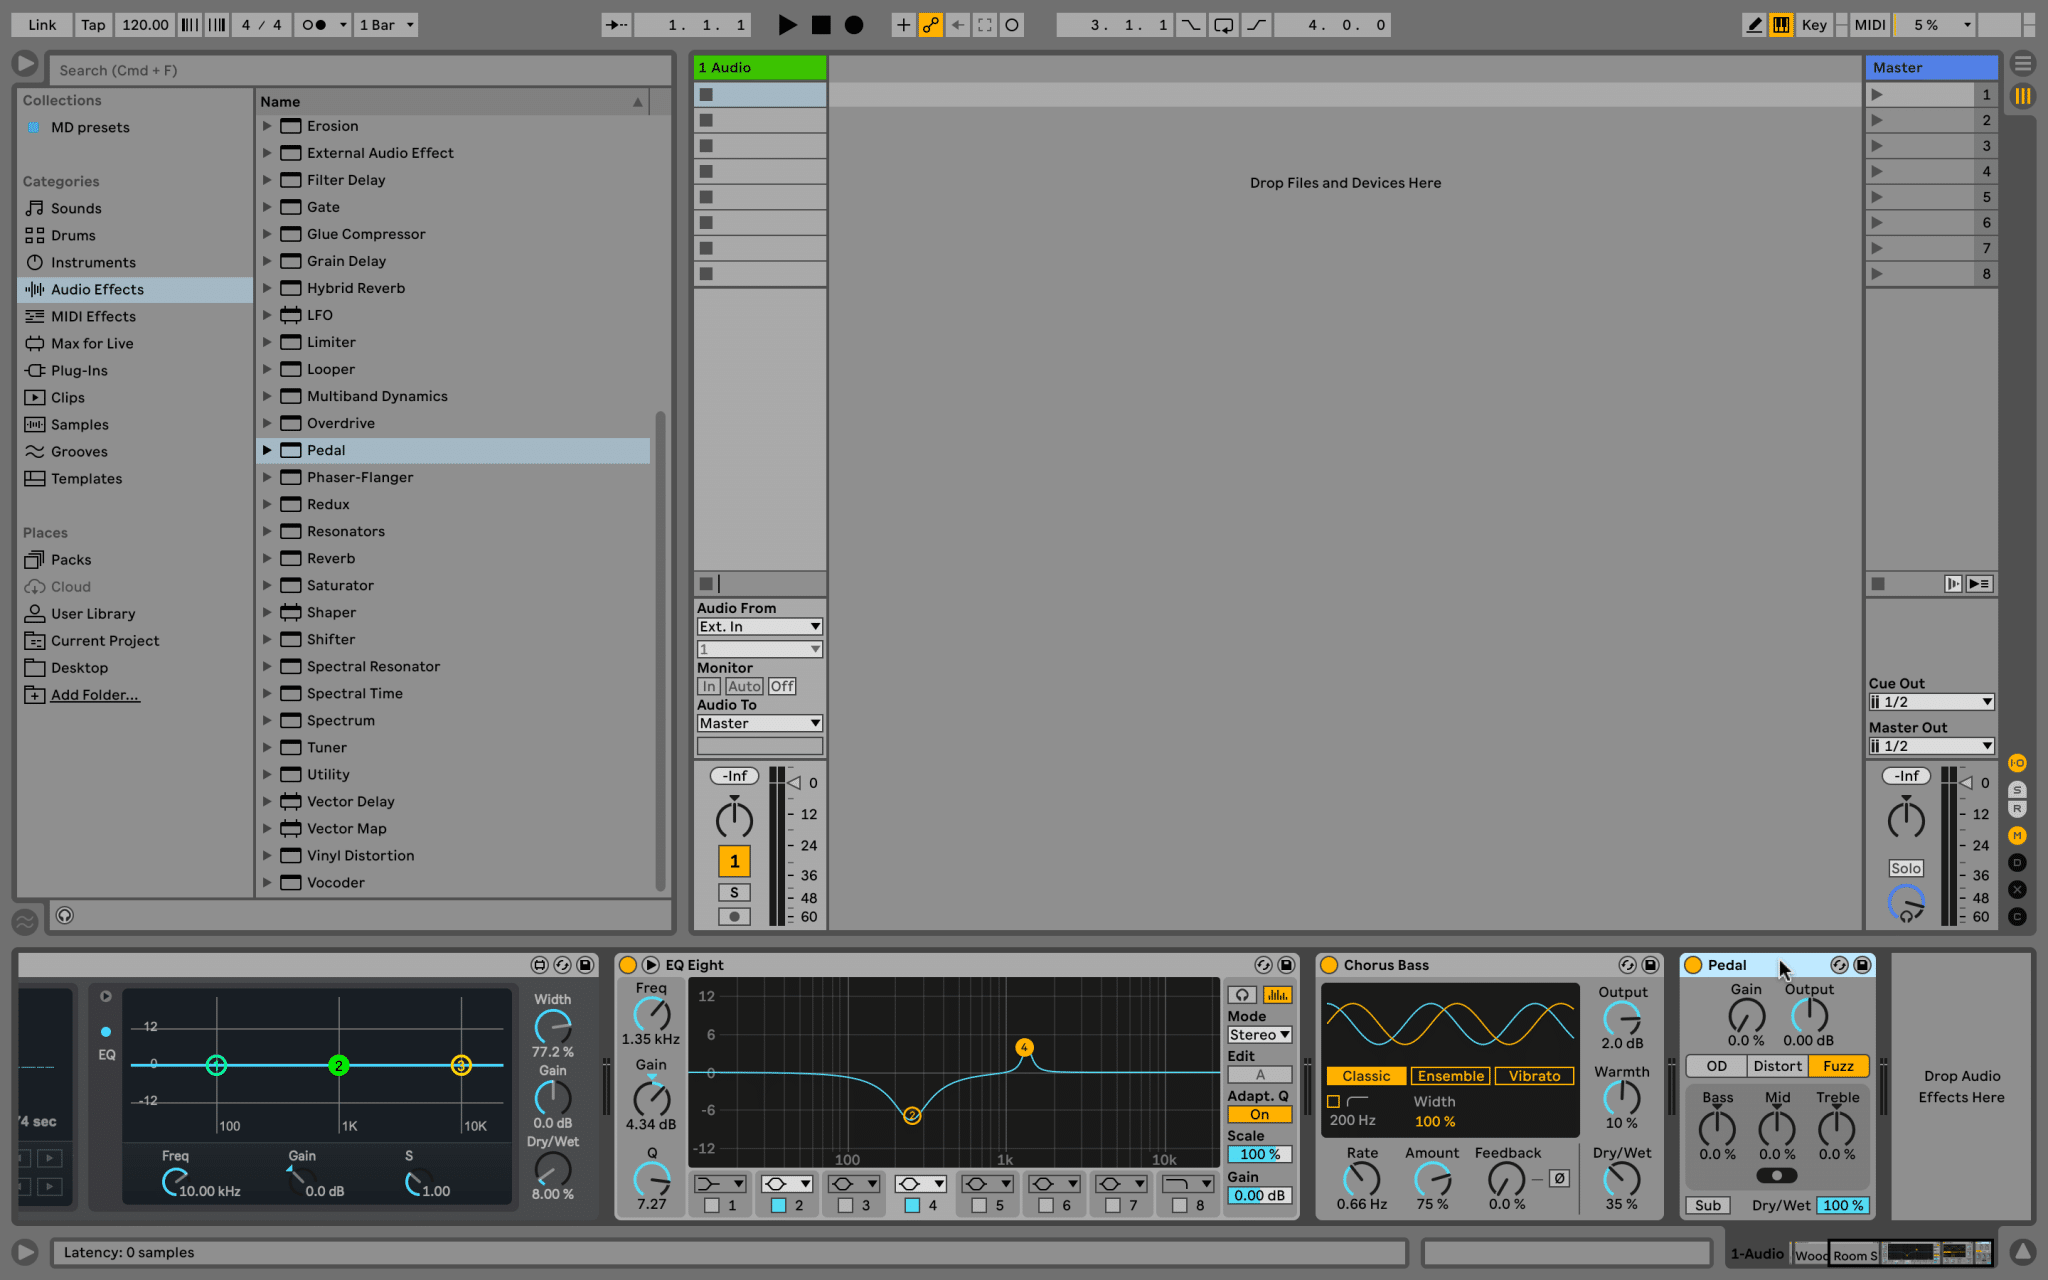
I love a bit of chorus in the set for an 80s vibe, so let’s put in Ableton’s Chorus audio effect device here.
Use a preset for this, or make your own adjustments according to the song and to your bass (I prefer to do that instead of using presets).
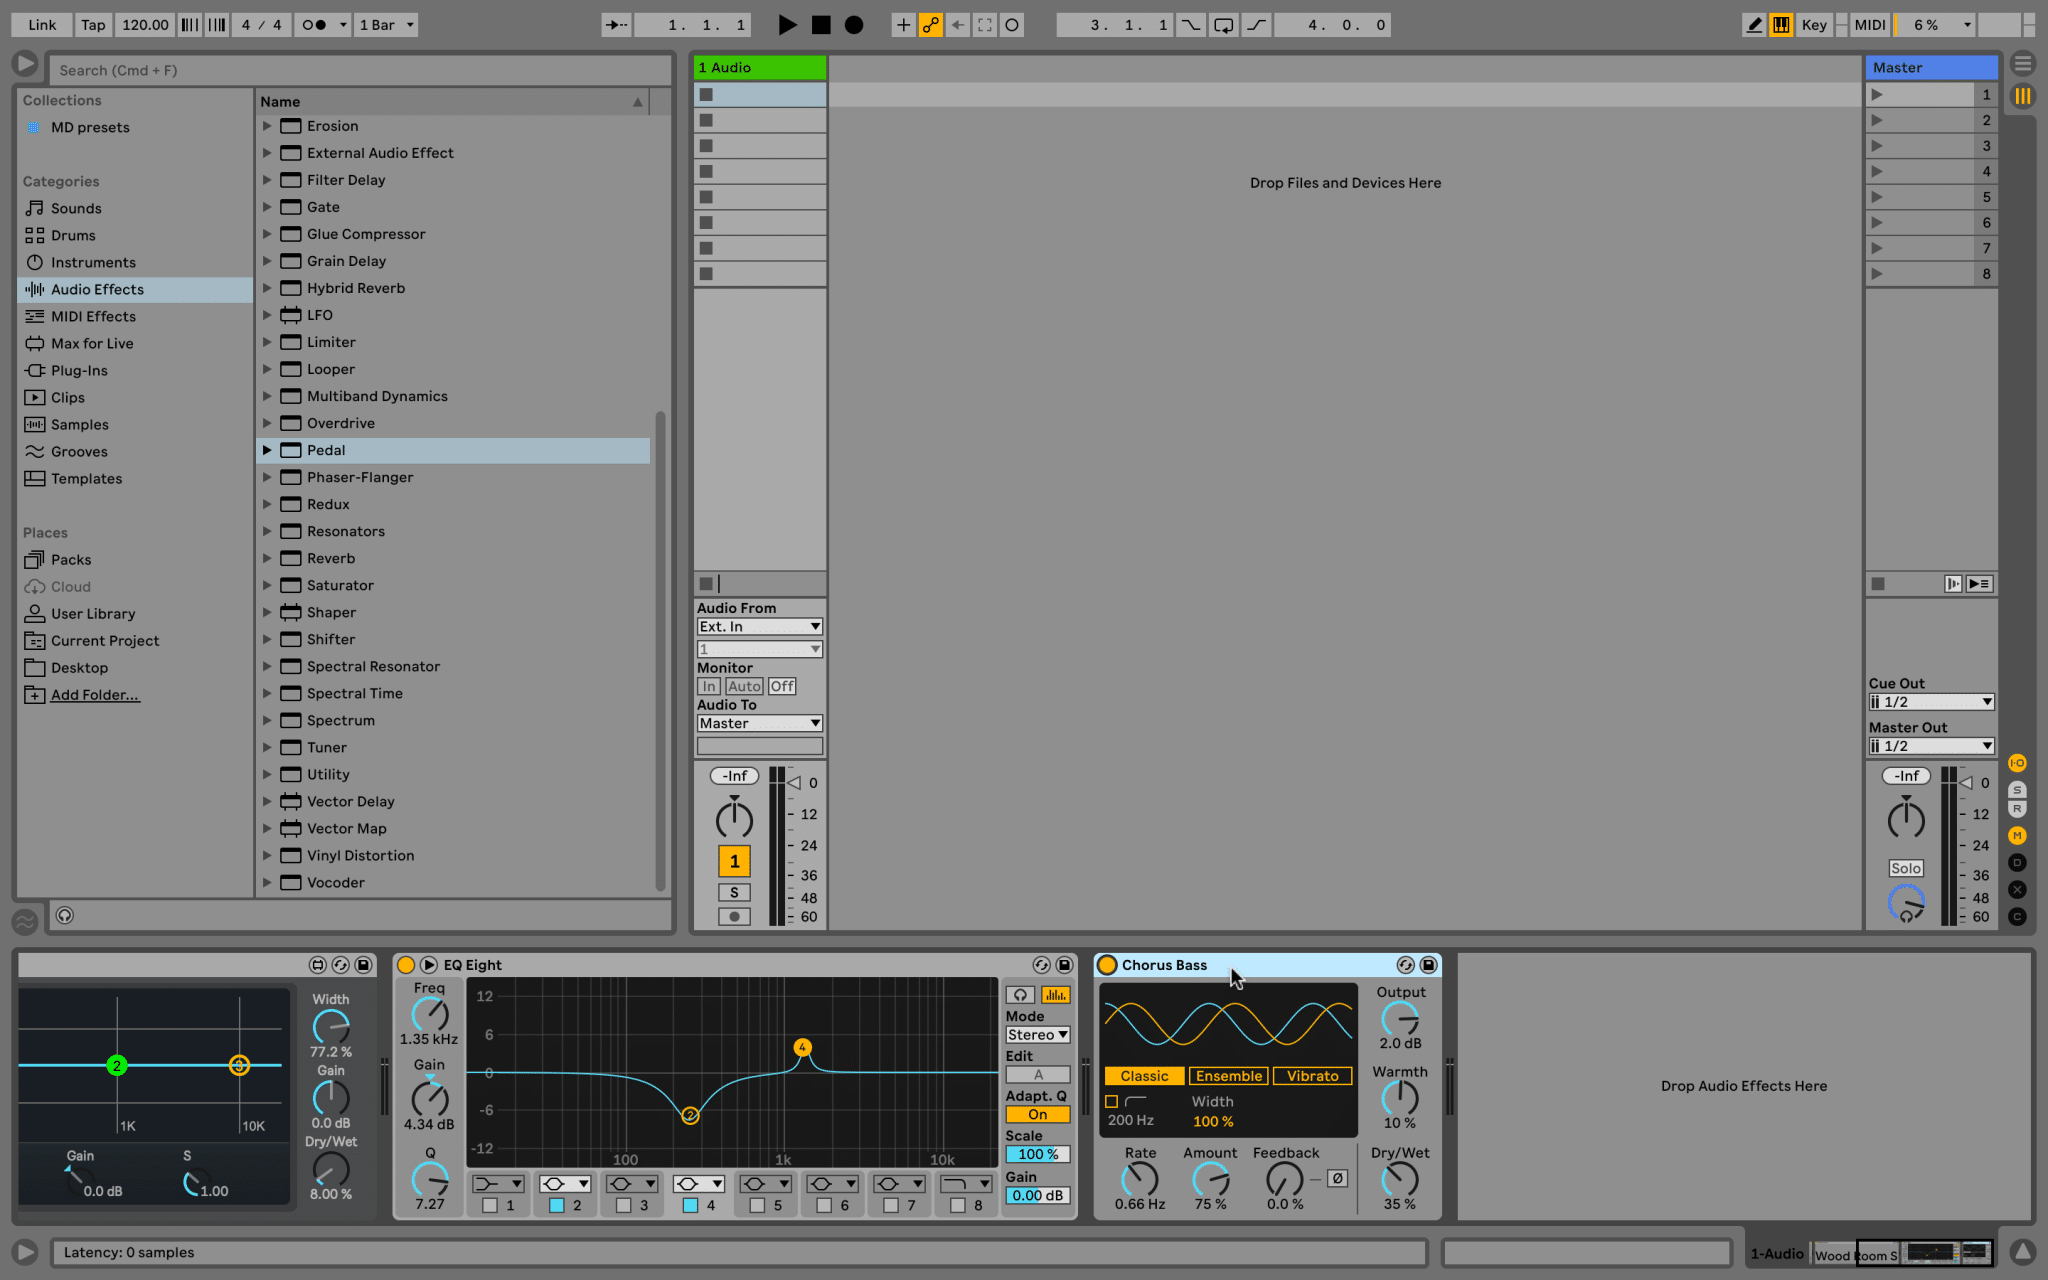
10 I like to bring in some distortion at least once in the set, so I load Live’s Pedal effect and put it in Fuzz mode. The most important thing with anything like this on bass is the Dry/Wet control.
You do not have to sacrifice credibility and clarity in the low end.
You might also want to think of using an audio effect rack and totally splitting the signal frequencies to achieve more precise control over this.
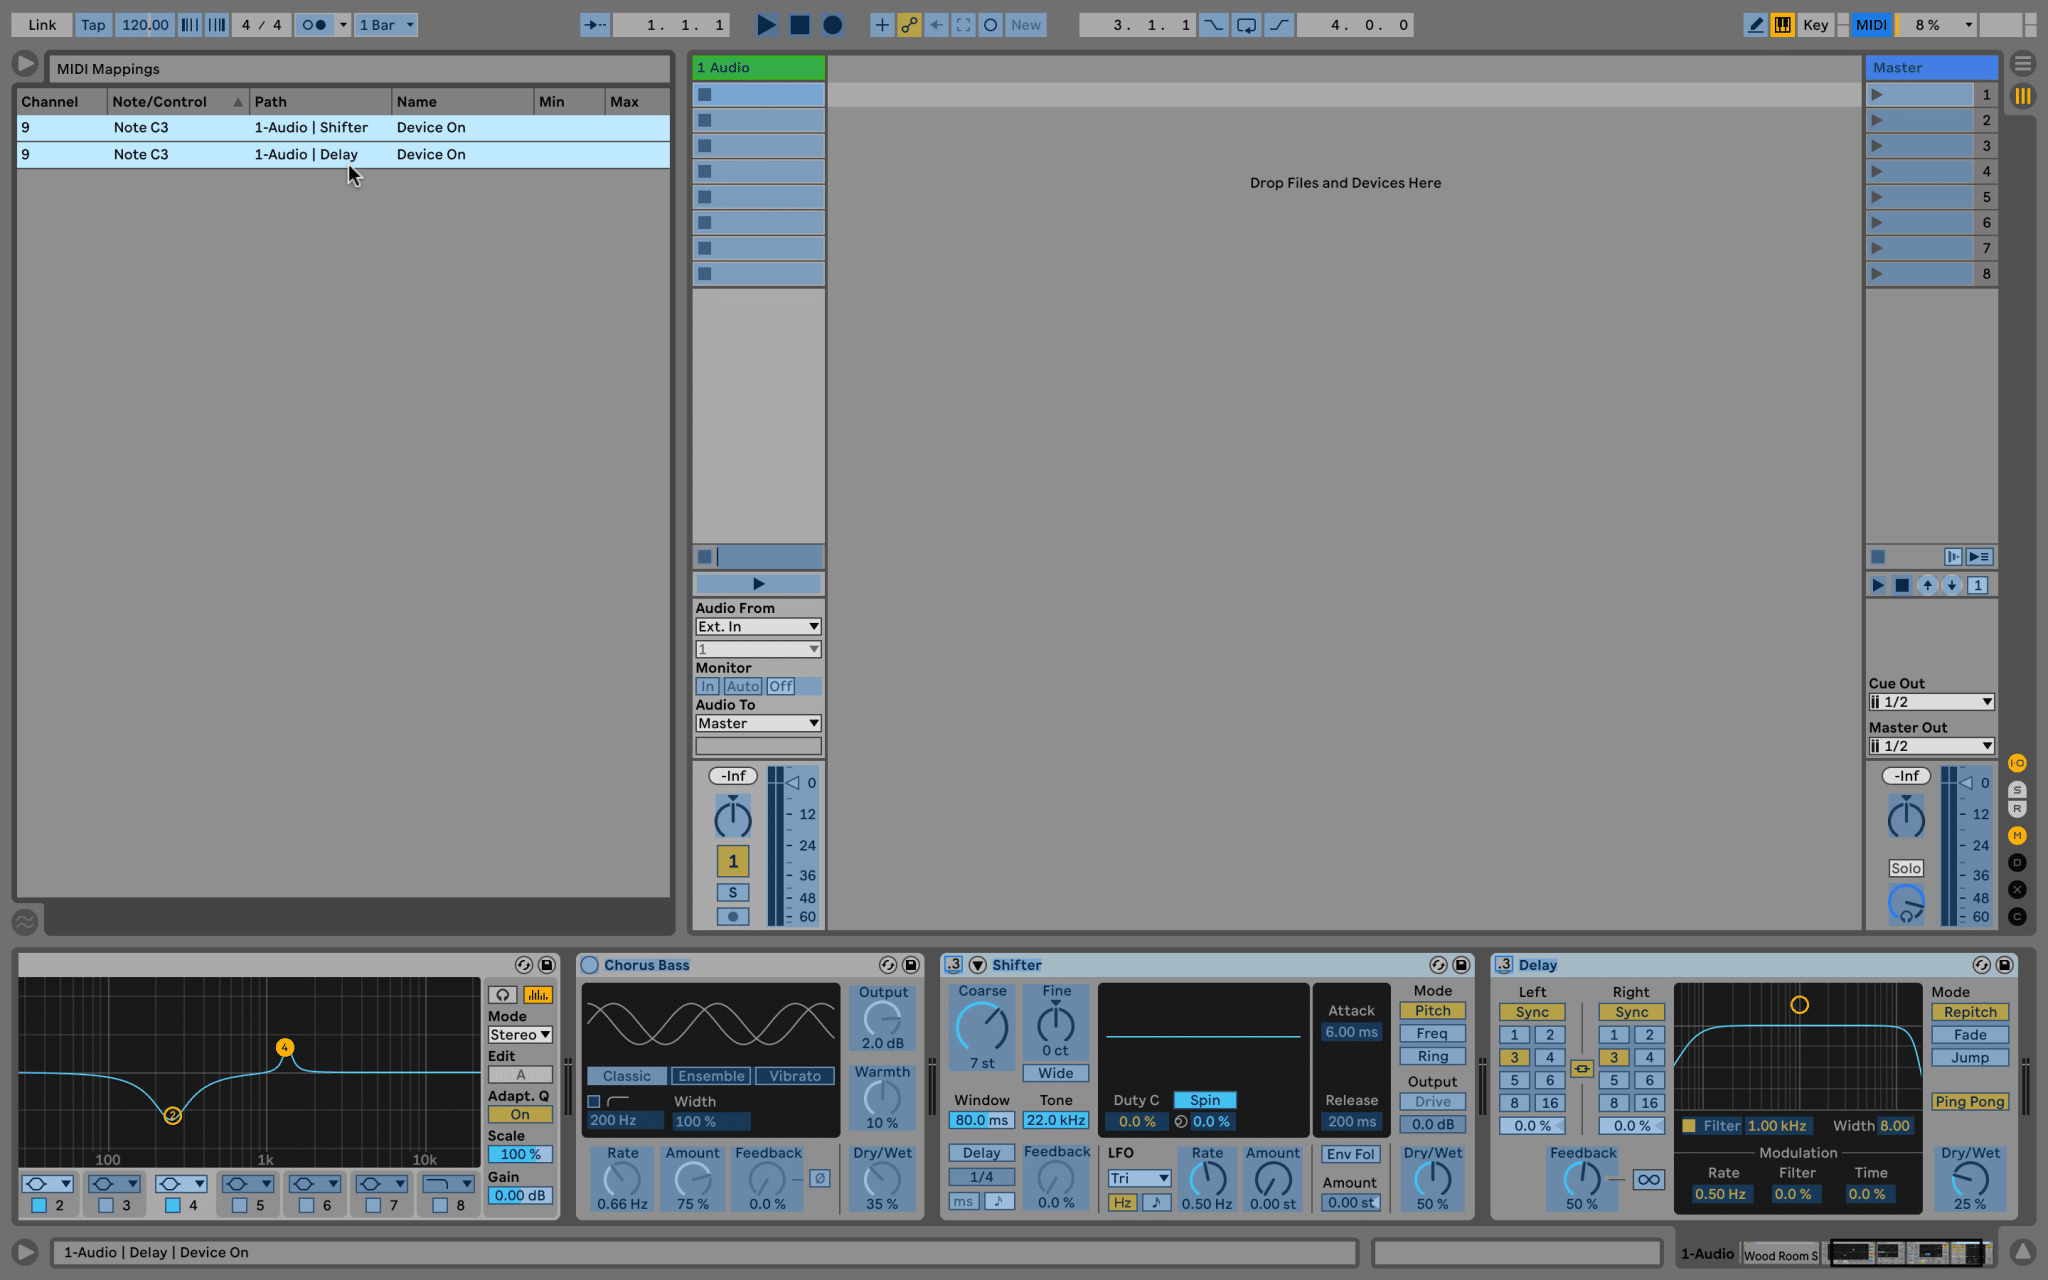
11 Now we come to a slightly different type of setup, as in this case, I want Pitch and Delay to activate at the same time.
If you’re using a MIDI pedalboard, you can put Live into MIDI Map Mode, and assign the same switch to turn both of these on/off together. Use cmd-m to enter MIDI Map Mode.
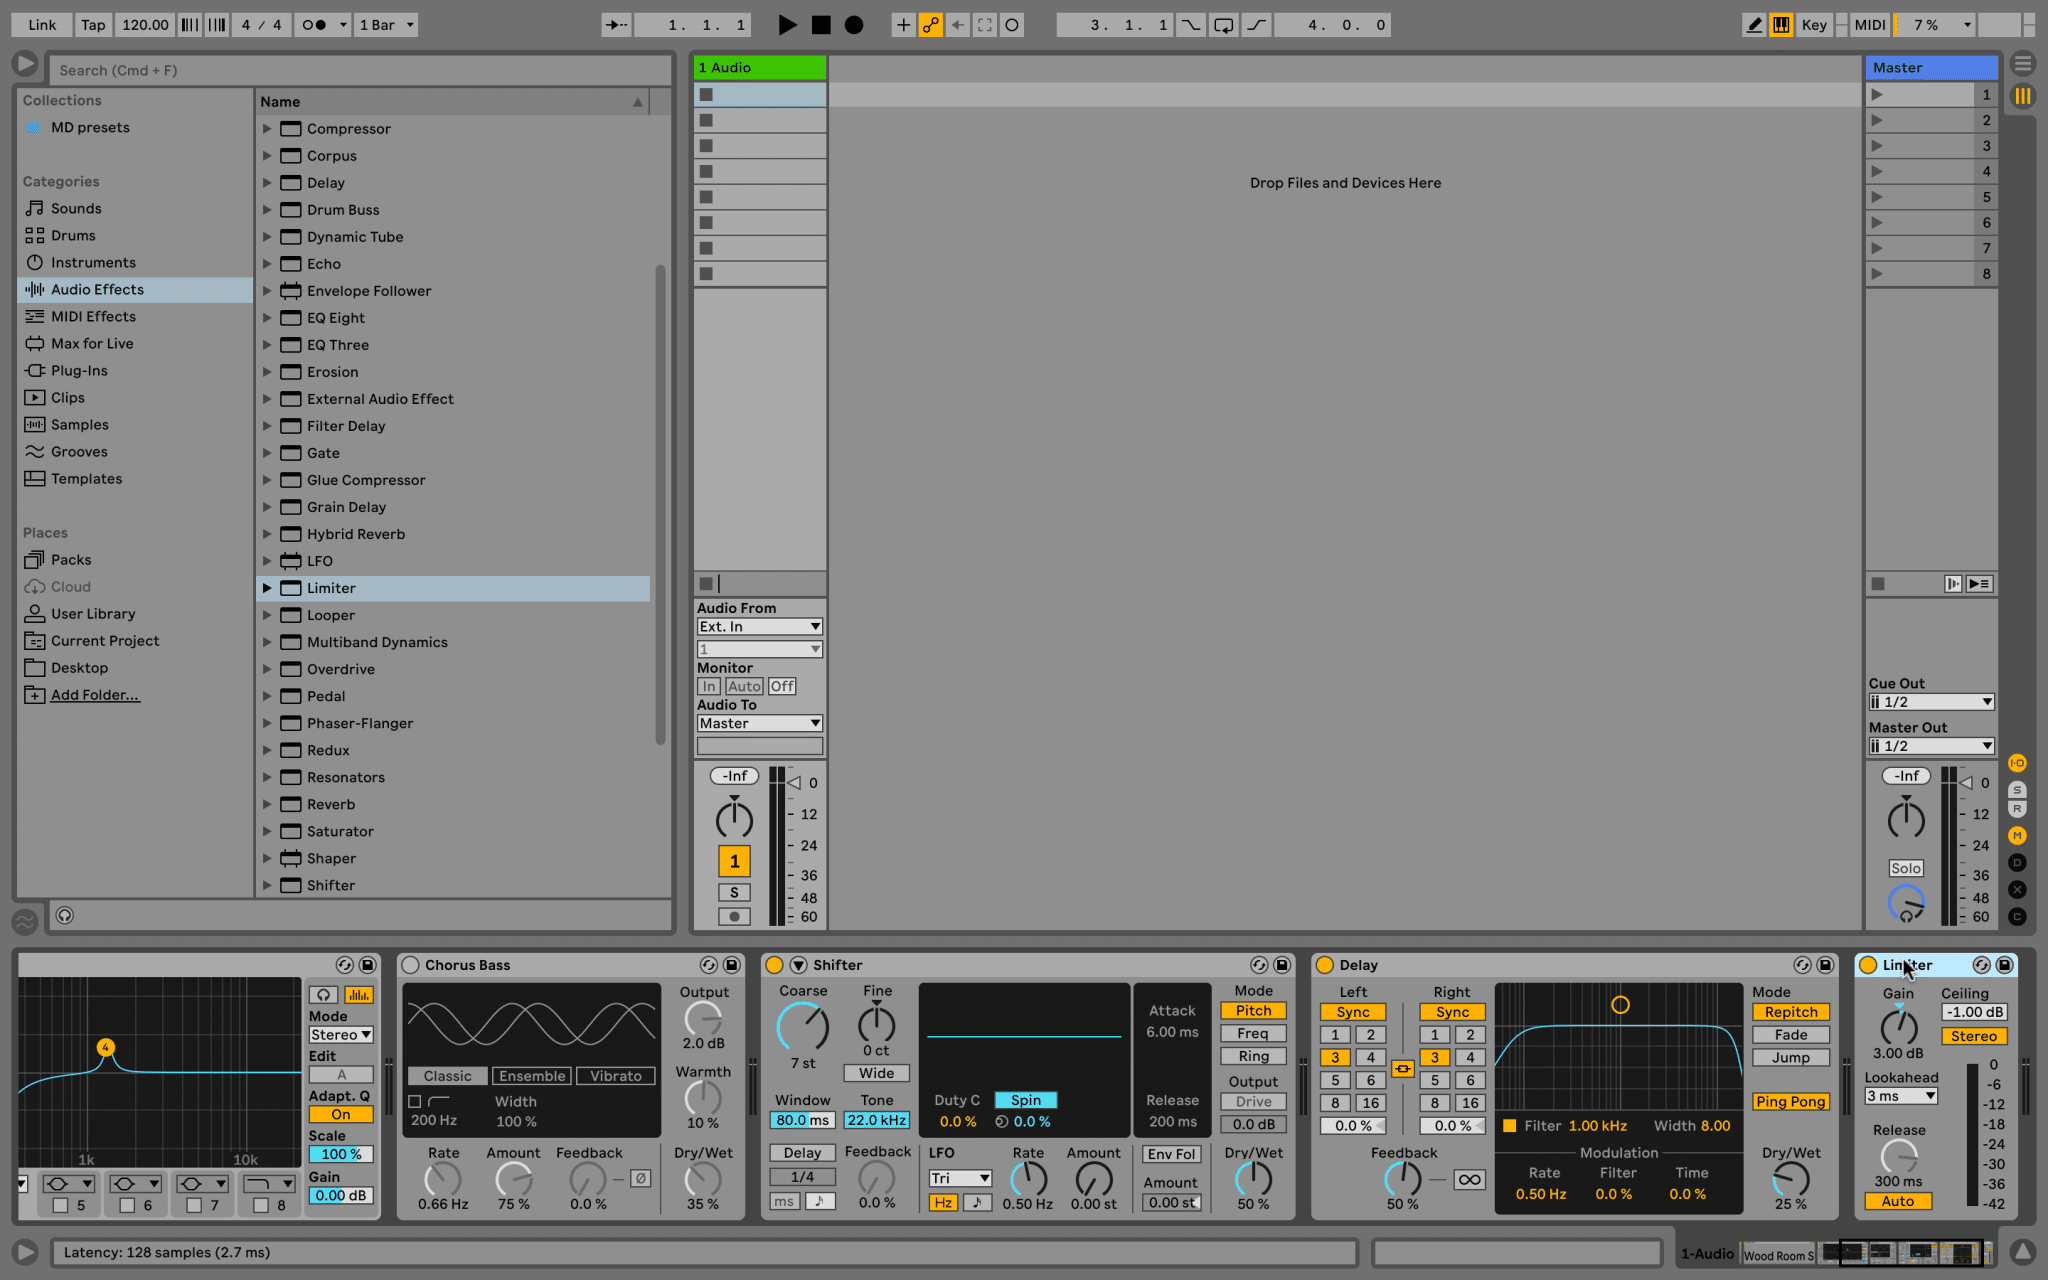
12 Our signal chain concludes with some dynamics management. Compression is very popular with bass players, sometimes more popular than it needs to be.
I do not like the way it sounds with my basses, but on the other hand, Limiter is definitely useful and for electronic live sets I put one on every track.
This does nothing more than put a cap on your volume levels, so it can save you from distortion if you get over-excited.
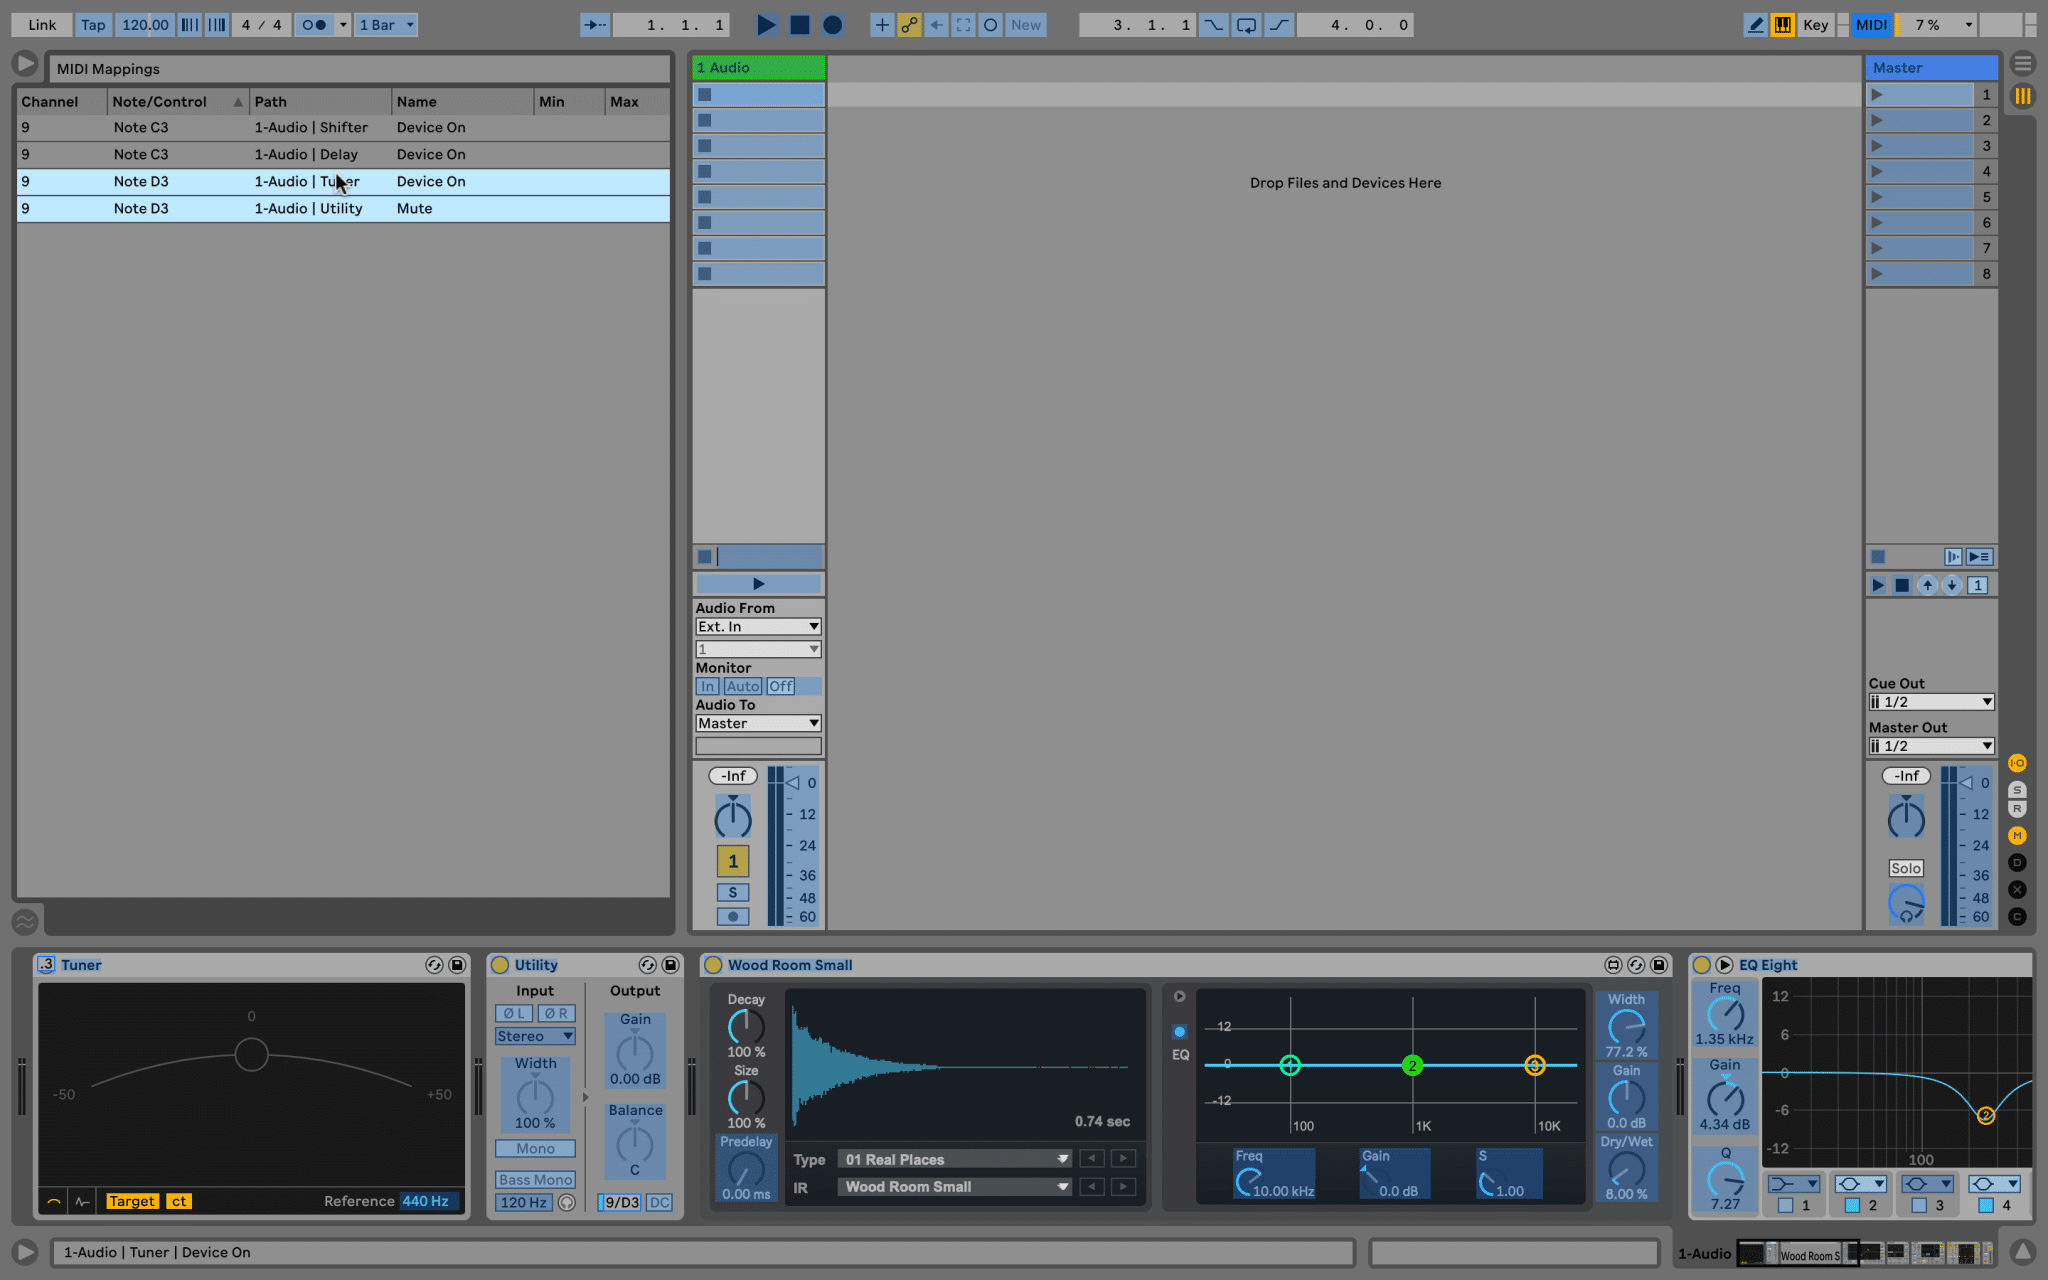
13 Ableton’s Tuner doesn’t have a mute mode, but we can work with it. Add the Utility device after Tuner.
Once again your MIDI pedalboard comes into play – re-enter MIDI Map Mode, and use a foot switch to map the Tuner ‘power’ button to toggle on/off, then use the same switch to map the mute switch in Utility.
Now when you stomp on the switch to enable the tuner, Utility kicks in and silences the output so nobody can hear you tuning up.
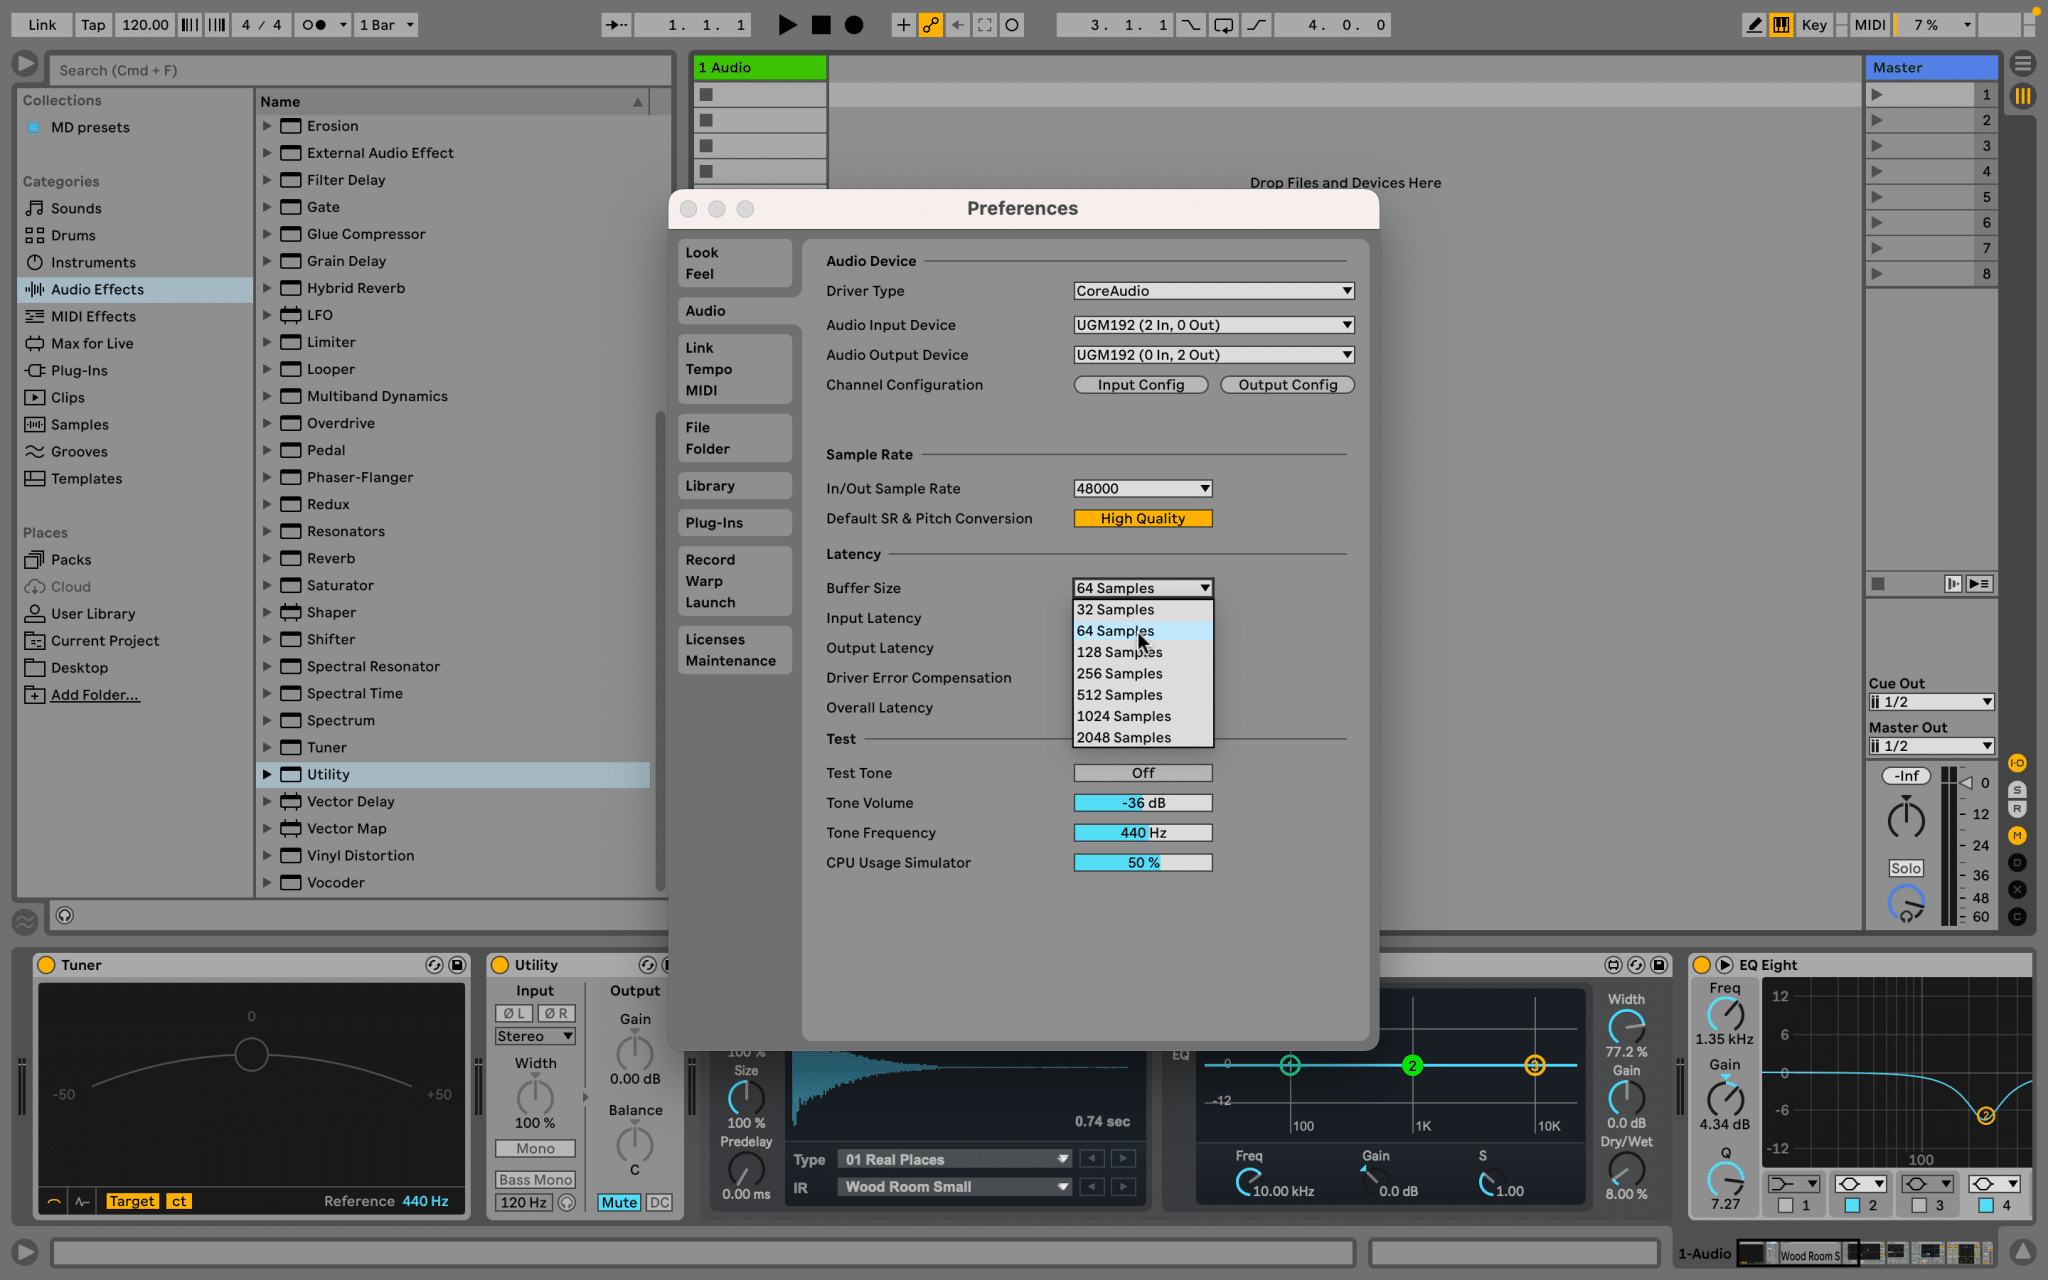
14 Latency is what we call the time it takes for your bass signal to travel from your interface input through your software, through the effects, and back out of the interface to the mixer.
These days any decent setup should be getting you very low values indeed. In Ableton Live 11 on the MacBook Pro, I can set the latency to 64 ms without any issues.
It’s a trade-off – higher values are easier on your CPU but introduce latency, and lower values are more responsive for live performance, but more dependent on the CPU.
There’s nothing wrong with changing these values on an ongoing basis depending on the situation.
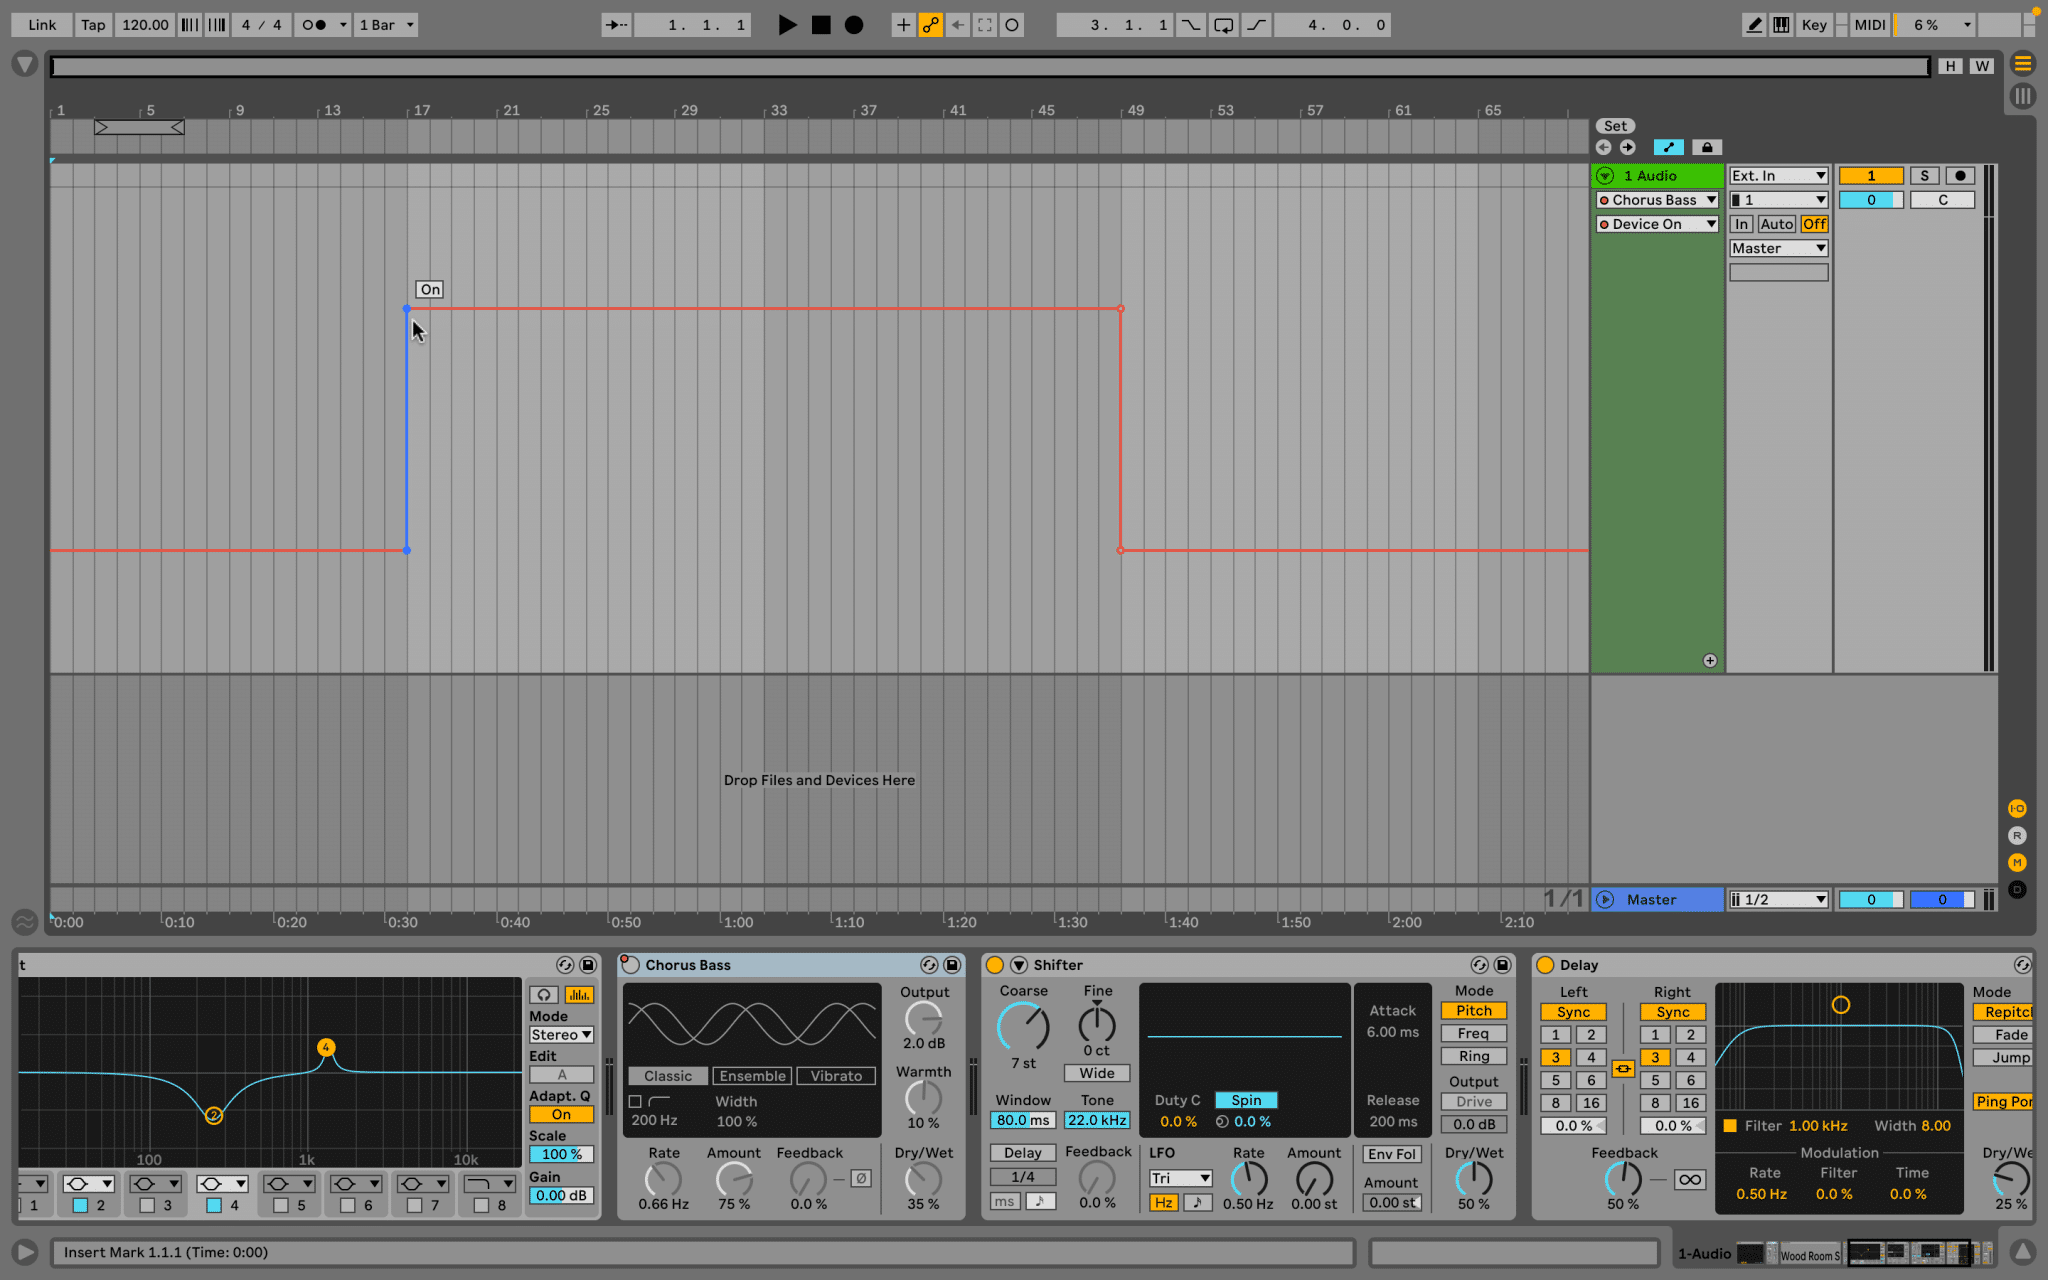
15 I mentioned using MIDI foot switches already, and they work great, but if you’re playing a set that has a really strict timeline, or a short set with no time to mess about, you could automate the effects instead, using track automation.
This is not good if you want to jam, but if you want to be free to just play, and to feel confident that the effects are going to activate no matter what, it’s the only way.
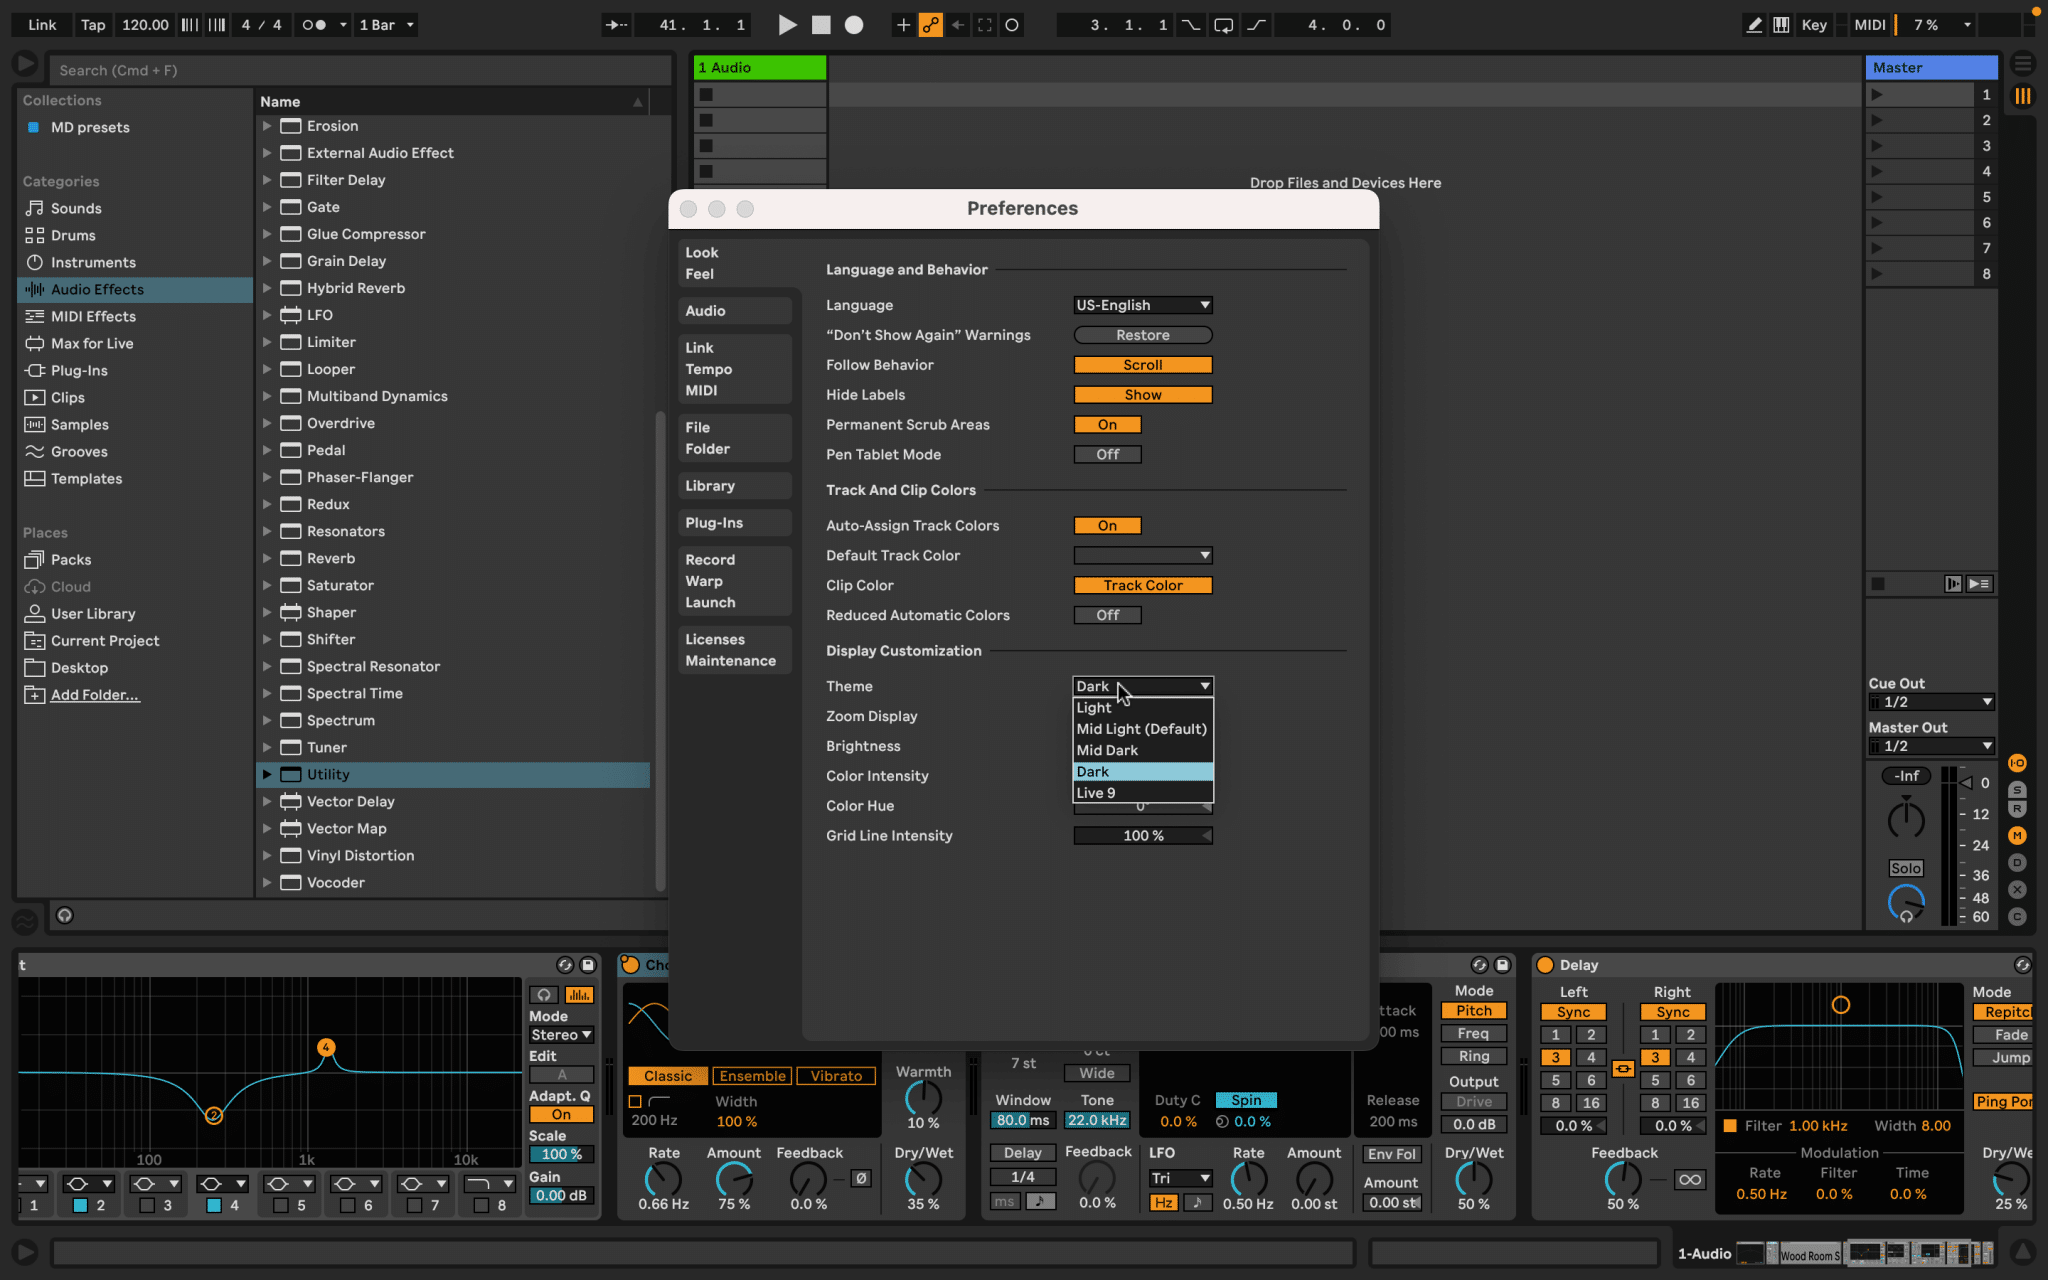
16 There are some visual changes we can make via Live’s Preferences. Under the Look/Feel tab, you can change the overall colour scheme, and other visual elements such as brightness, independent of the computer as a whole.
The way I work is default light grey for day-to-day use, and dark for on-stage. Finally, you can also zoom Live’s display, to better fit everything to your computer display, I do not want to be scrolling during a set!
Wrap everything up by selecting all of the devices in your new bass signal chain, and typing cmd-g to create an audio effect rack.
Then click the little ‘disk’ icon at the top of the rack, name and save your rack, ready to use in your future projects.
CONCLUSION
My setup changes all the time, the journey is the destination; in a few months (or even weeks) I might post about a totally different setup.
That’s life, but I hope it’ll give you some ideas. I’ve kept this one focused on Ableton-only devices, but soon I’ll come back and discuss some third-party options.
The good thing about using native devices is that any computer with Live on it has a better chance of hosting your channel if necessary, even a Live demo version should be able to handle it in a pinch.
Now…play bass!
More Information
BIO
Martin Delaney is a journalist, musician, photographer, and teacher. He writes regularly for Computer Music magazine and plays bass for The Witch Of Brussels.
www.martindelaneyphotography.london