
If you’re at the three-month mark of your guitar journey, you’ve likely hit the most notorious roadblock in acoustic playing: the dreaded barre chord wall. You line up your fingers for an F major or a B minor, strum down, and instead of a triumphant, ringing chord, you get a dull, thudding thwack.
It’s incredibly frustrating, and most well-meaning advice gets it completely wrong. People will tell you to “just press harder,” “build your hand strength,” or “push through the pain.”
Let’s be candid: Brute-forcing a barre chord is a fast track to wrist fatigue, hand cramps, and awful technique. Acoustic guitars have high string tension; your thumb muscles simply aren’t designed to pinch that tightly for a three-minute song.
Perfecting your barre chord technique isn’t about raw squeezing power. It’s about leveraging the mechanics of your arm and the anatomy of your fingers. Here is a deep dive into three physical micro-adjustments you can make right now to get those chords ringing cleanly.
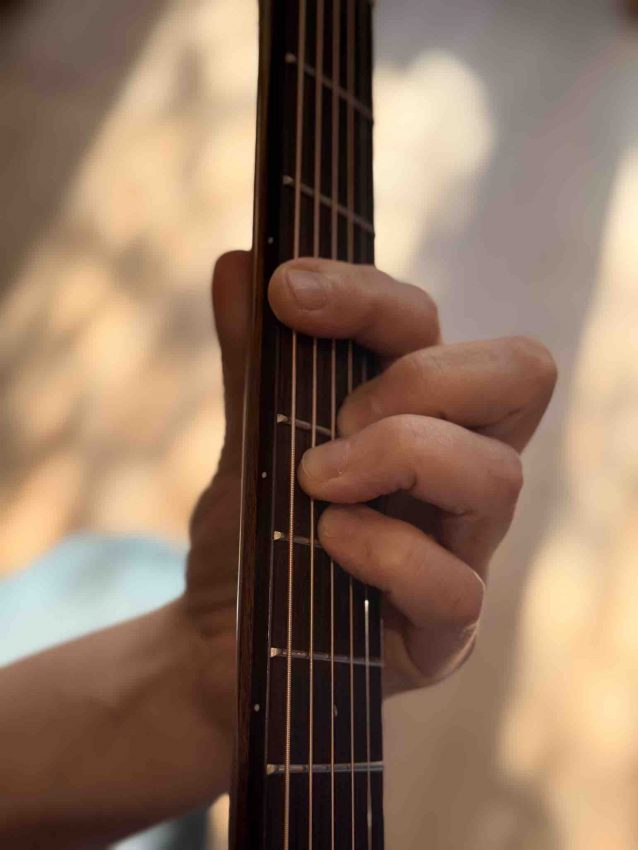
1. The ‘Bone vs. Flesh’ Finger Rotation Trick
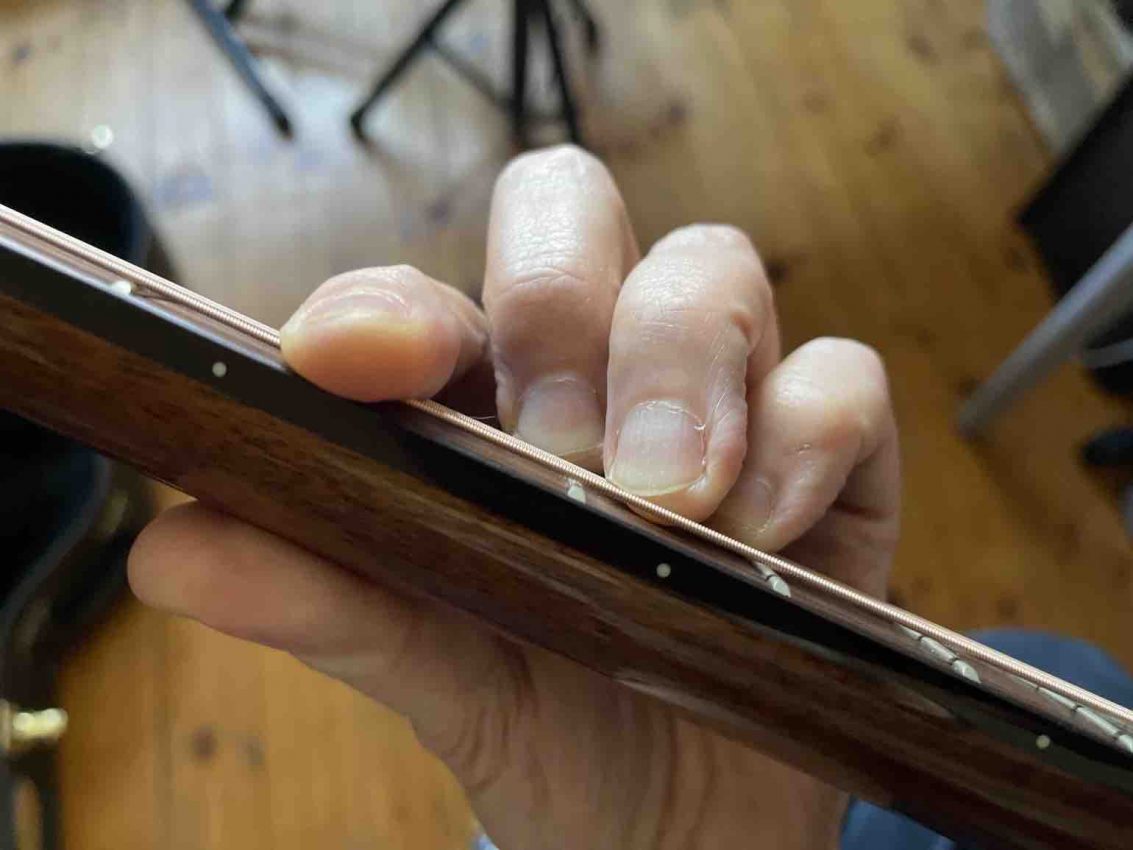
Take a look at the palm side of your index finger. You’ll see soft, fleshy pads and deep creases at your knuckles. If you lay your finger perfectly flat across the fretboard, the strings will inevitably sink into those soft spots.
The Example: Imagine trying to hold down a stiff wire using a marshmallow. The wire just sinks in, right? Now imagine pressing that same wire with a wooden dowel. The hard surface pins it instantly. You want your finger to act like the dowel, not the marshmallow.
Step-by-Step Instructions:
-
Place your index finger lightly across all six strings at the 5th fret (we start higher up the neck because the string tension is looser).
-
Roll your finger slightly toward the headstock of the guitar. Your thumb should point naturally upward as you do this.
-
Feel the strings against the harder, bony, outer edge of your finger instead of the soft, flat underside.
-
Shift vertically just a millimeter or two up or down until you ensure none of the strings are trapped directly under a knuckle crease.
-
Apply pressure. You should immediately notice that it takes significantly less effort to hold the strings down.
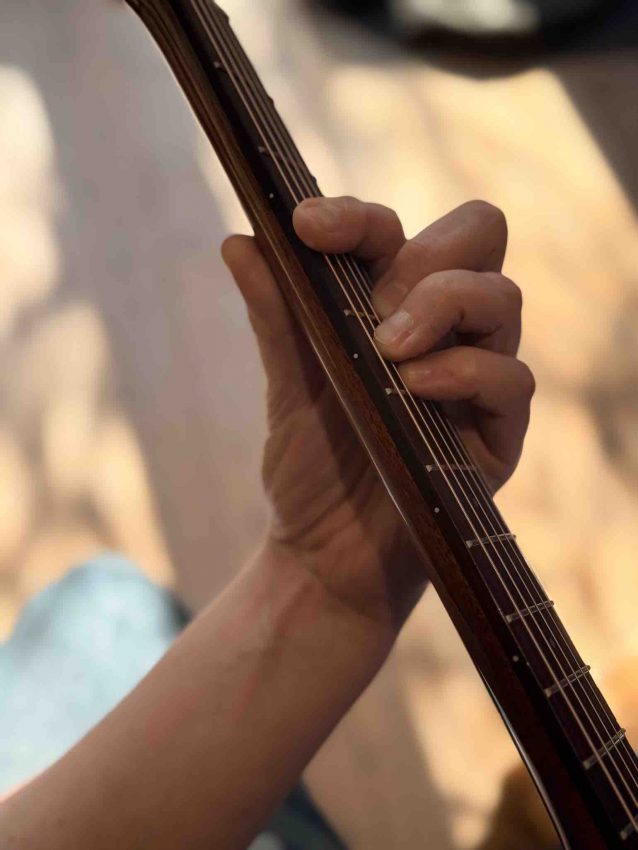
2. The ‘Elbow Pivot’ for Natural Leverage
When beginners struggle with muted strings, their instinct is to pinch the neck of the guitar as hard as they can between their thumb and index finger. This exhausts the tiny muscles in your hand in seconds. Instead, you need to use the larger, stronger muscles in your arm and back.
The Example: Think about pulling open a heavy door. You don’t just squeeze the handle and use your wrist; you hold the handle and lean your body weight backward. We are going to apply that same physics trick to the guitar neck.
Step-by-Step Instructions:
-
Pin the guitar body securely against your torso with your strumming arm. This anchors the instrument.
-
Form your barre chord with your fretting hand. Keep your thumb resting lightly on the middle of the back of the neck—do not squeeze.
-
Tuck your fretting elbow in slightly closer to your ribcage.
-
Relax your shoulder and let the natural weight of your arm pull your hand backward toward your body.
-
Let the guitar neck act as a fulcrum. Your arm weight pulls the strings down into the frets, while your strumming arm keeps the guitar from moving forward. The thumb is just there for guidance, not power.
3. The 60-Second Daily Pressure Drill
Because you are likely used to “death-gripping” the guitar, your muscle memory doesn’t actually know what the correct amount of pressure feels like. You need to recalibrate your brain to find the “Minimum Effective Pressure” (MEP).
The Example: It’s like finding the bite point on a car’s clutch. If you push too hard, you waste energy; if you don’t push enough, the engine stalls. You want the exact sweet spot in the middle.
Step-by-Step Instructions:
-
Set up your barre shape (again, try the 5th fret for an A Major barre chord) but rest your fingers on the strings without pressing down at all.
-
Strum the guitar. It should sound completely muted (a “chug” sound).
-
Pick string by string from the thickest to the thinnest. As you pick, begin applying pressure to the fretboard in agonizingly slow motion.
-
Freeze immediately the exact moment the notes change from a muted thud to a clear ring.
-
Hold that exact pressure for 5 seconds. Close your eyes and notice how surprisingly light and effortless it feels in your hand.
-
Release completely, then repeat the process 3 times.
A Quick Reminder: Building a solid barre chord technique is a mechanical puzzle, not a strength test. Whenever your hand starts to cramp, stop immediately. Shake it out, check your finger rotation, reset your elbow, and let gravity do the work.
In the short video below, you can see me fret the notes and then apply the barre. I am not squeezing the guitar neck hard; my hand is relaxed, and I am letting the notes ring out by applying the correct amount of pressure. My elbow is tucked in against my body, making the whole process a lot easier and leveraging my body’s mechanics.
This way, I can relax and play the chord without applying much pressure with my hand and fingers, thus avoiding fatigue or pain in my fingers.

The Bottom Line: Mechanics Over Muscle
Hitting the barre chord wall is a frustrating rite of passage for almost every acoustic guitar player, but it doesn’t have to be a permanent roadblock. If you take anything away from this guide, let it be this: your hand isn’t weak, your mechanics just need a little fine-tuning.
Whenever you sit down to practice and hear that dreaded muffled thwack, don’t just grit your teeth and squeeze harder. Instead, pause, relax your hand, and run through this quick physical checklist:
-
Check your finger: Are you using the hard, bony edge rather than the soft, fleshy pad?
-
Check your elbow: Is it tucked in, letting gravity and your arm weight do the heavy lifting?
-
Check your pressure: Are you using the minimum effective pressure, or are you death-gripping the neck?
Be patient with yourself as you build this new muscle memory. Celebrate the small victories—even if it’s just getting four strings to ring out clearly today when only two did yesterday. Keep your practice sessions short, focused, and free of pain, and those full, ringing barre chords will soon become second nature.
#Barre Chords
This article may contain affiliate links to Andertons, DeathCloud, Donner, Fender, Gear4Music, Positive Grid, Sweetwater, and Thomann that help finance the running costs of GuitarBomb. We will receive a small commission if you buy something through these links. Don’t worry; you pay the same price, and it costs you no extra to use these affiliate links for your purchases.


