Are you looking to take your guitar’s comfort and playability to the next level? Imagine a fretboard that feels like it was custom-made for your hand – smooth, ergonomic, and utterly effortless to navigate. This isn’t just a dream; it’s achievable by “rolling” your guitar’s fingerboard edges.
This simple yet effective modification involves gently rounding off the sharp, often squared-off edges of your fretboard, transforming them into a soft, inviting curve. The result? Reduced hand fatigue, improved comfort during extended playing sessions, and a truly premium feel.
How to Roll Your Guitar Fretboard Edges
This comprehensive guide will walk you through the process, equipping you with the knowledge to achieve a professional-looking rolled fingerboard edge right in your own home. Get ready to fall in love with your guitar all over again!
Why Roll Your Fingerboard Edges? The Benefits You Can Feel
- Enhanced Comfort: Say goodbye to sharp edges digging into your hand. A rolled edge provides a natural, comfortable resting place for your thumb, especially when playing for extended periods.
- Smoother Playability: Your hand will glide effortlessly along the neck, making transitions between chords and soloing feel more fluid and less restrictive.
- Premium Feel: Many high-end guitars feature rolled fingerboard edges as standard, contributing to their luxurious and comfortable playability. Now you can achieve that same feel on your own instrument.
- Reduced Hand Fatigue: By eliminating pressure points, rolling the edges can significantly reduce hand and wrist strain, allowing you to play longer without discomfort.
What You’ll Need: Tools for the Job
The beauty of this mod is its simplicity. You likely already have most of these tools on hand:
- Files: A small, fine-cut file (like a needle file or a specific fret dressing file) is ideal for initial shaping.
- Sandpaper: A selection of grits, from medium (around 220-320 grit) for initial shaping to fine (400-600 grit) and even super-fine (800-1000+ grit) for refinement and polishing.
- Razor Blade (Optional, Use with Extreme Caution): For very subtle material removal, especially on softer woods. Only for experienced users and with the utmost care.
- Super Fine Steel Wool (Optional): For final polishing and removing any micro-scratches.
- Masking Tape (Optional but Recommended): To protect your frets if you’re concerned about accidental contact.
Your Step-by-Step Guide to Rolling Fingerboard Edges
Ready to transform your guitar? Follow these steps carefully for the best results:
Step 1: Preparation is Key
- Remove the Strings: This is non-negotiable. You need clear, unobstructed access to the entire fingerboard edge. Removing the strings also prevents any accidental damage to them during the process.
- Choose Your Method: Decide whether you’ll primarily use a file, sandpaper, or, if you’re very experienced, a razor blade for the initial material removal. For most DIYers, a file and sandpaper combo is the safest and most effective.
- Consider Fret Protection (Optional): If you’re new to this, you might want to apply masking tape to the tops of your frets. This provides an extra layer of protection against accidental scratching while you work on the edges.
Step 2: The Art of Filing or Sanding
This is where the magic happens. Patience and a light touch are your best friends here.
- Work at an Angle: The goal is a gentle curve, not a flat bevel. Hold your file or sandpaper at a slight angle (around 30-45 degrees) to the fingerboard edge.
- Gentle, Consistent Strokes: Apply gentle, consistent pressure and pull your tool back along the edge, removing a small amount of material with each pass. Avoid pushing down hard or trying to remove too much at once.
- Start at the First Fret and Work Up: Begin at the nut end of the fretboard (first fret) and systematically work your way up towards the body of the guitar, rolling the entire length of both edges.
- Be Consistent: The key to a professional look and feel is consistency. Ensure you’re applying similar pressure and removing a uniform amount of material along the entire edge, from the first fret to the last.
- Regularly Check for Evenness: Frequently stop and feel the edge with your thumb and fingers. Does it feel evenly rounded? Are there any flat spots or inconsistencies? Adjust your technique as needed. Aim for a smooth, gradual curve.
Step 3: Refinement for a Silky Smooth Finish (Optional but Recommended)
Once you’ve achieved the desired initial curve, it’s time to refine it for ultimate smoothness.
- Graduate to Finer Sandpaper: Switch to finer grit sandpaper (e.g., 400 grit, then 600 grit, and even 800-1000 grit or higher). This will progressively remove any remaining scratches and create a silky-smooth finish. Continue using the angled, consistent strokes.
- Utilize a Fret Dressing File (Optional): A dedicated fret dressing file, with its rounded edges, can be incredibly useful here. It allows you to further refine the rounded edges and ensure a seamless transition between the fingerboard and the fret ends. Work carefully around each fret.
Step 4: The Final Polish (Optional)
For that extra touch of perfection and a truly luxurious feel:
- Super Fine Steel Wool: Take a piece of super fine steel wool (#0000 grade) and gently rub it along the newly rolled edges. This will remove any microscopic scratches and leave a beautifully polished, smooth surface.
Important Considerations for a Successful Mod
- Razor Blade Caution: If you choose to use a razor blade for initial material removal, exercise extreme caution. Hold it almost parallel to the edge and apply incredibly light pressure. A razor blade can easily remove too much material or cut into the wood deeply if not handled with care. This method is generally for very experienced users.
- Protect Your Frets: Always be mindful of the frets. When sanding or filing, avoid direct contact with the fret crowns themselves to prevent damage or flat spots. Masking tape can be a great preventative measure.
- Practice Makes Perfect: Don’t expect perfection on your first attempt. The more you practice this technique, the better you’ll become at judging the right amount of material to remove and achieving a consistently smooth, comfortable finish. If you have an old, spare neck, consider practicing on that first.
- Go Slow: There’s no rush. It’s always easier to remove a little more material than to try and add it back. Take your time, check your progress frequently, and enjoy the process.
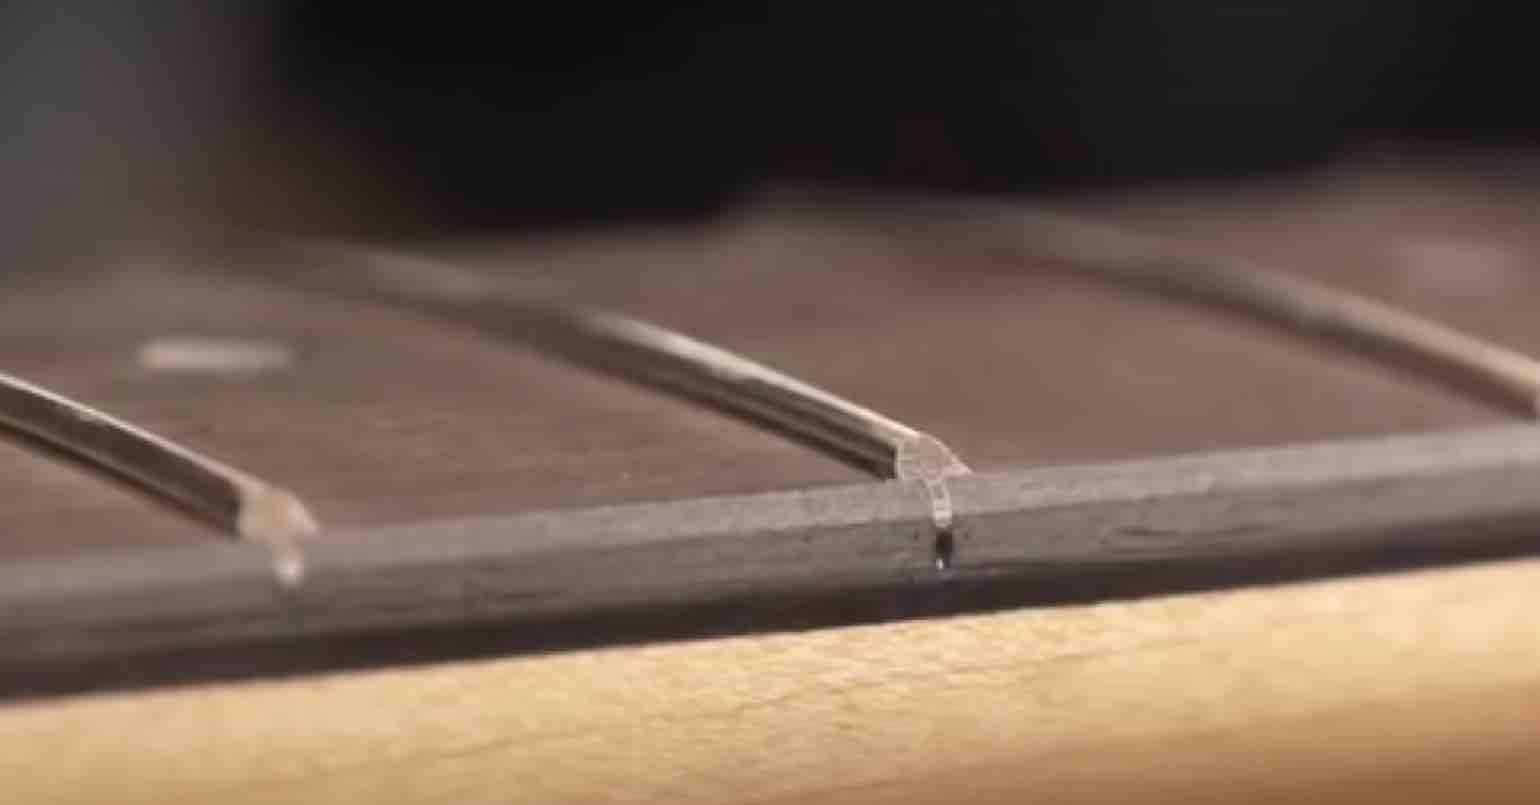
The “Compression Roll”
Are you seeking that elusive, custom-shop comfort for your guitar’s neck? Imagine a fretboard that molds perfectly to your hand, feeling incredibly smooth and effortless to navigate. While traditional methods involve filing and sanding, there’s an ingenious alternative that allows you to achieve this premium feel by simply compressing the wood, rather than removing it.
This technique, often called the “compression roll,” uses a smooth, hard object to gently reshape the sharp edges of your fingerboard into a soft, inviting curve. The result? Dramatically reduced hand fatigue, improved comfort during those epic solos or long practice sessions, and a truly high-end ergonomic feel, all without losing precious fretboard real estate.
This comprehensive guide will walk you through the surprisingly simple process of compression rolling your fingerboard edges. Get ready to experience your guitar in a whole new, wonderfully comfortable way!
Why Compress Your Fingerboard Edges? The Unique Benefits You’ll Feel
- Enhanced Comfort, Naturally: Instead of sharp corners digging into your hand, the compressed edges provide a natural, ergonomic resting place for your thumb and fingers.
- Zero Material Loss: Unlike filing or sanding, this method doesn’t remove any wood. You’re simply densifying and reshaping the existing material, preserving the original dimensions of your fretboard.
- Smoother Playability, Effortlessly: Your hand will glide along the neck with unprecedented ease, making transitions and chord changes feel more fluid and less strenuous.
- Premium Feel, DIY Style: Many top-tier guitars boast a “rolled” edge. Now you can achieve that same luxurious, comfortable feel on your own instrument with a simple, accessible technique.
- Reduced Hand Fatigue: By eliminating pressure points, the compression roll can significantly reduce strain on your hand and wrist, allowing you to play longer, happier, and without discomfort.
What You’ll Need: Tools for the Compression Roll
The beauty of this method lies in its elegant simplicity and minimal tool requirements:
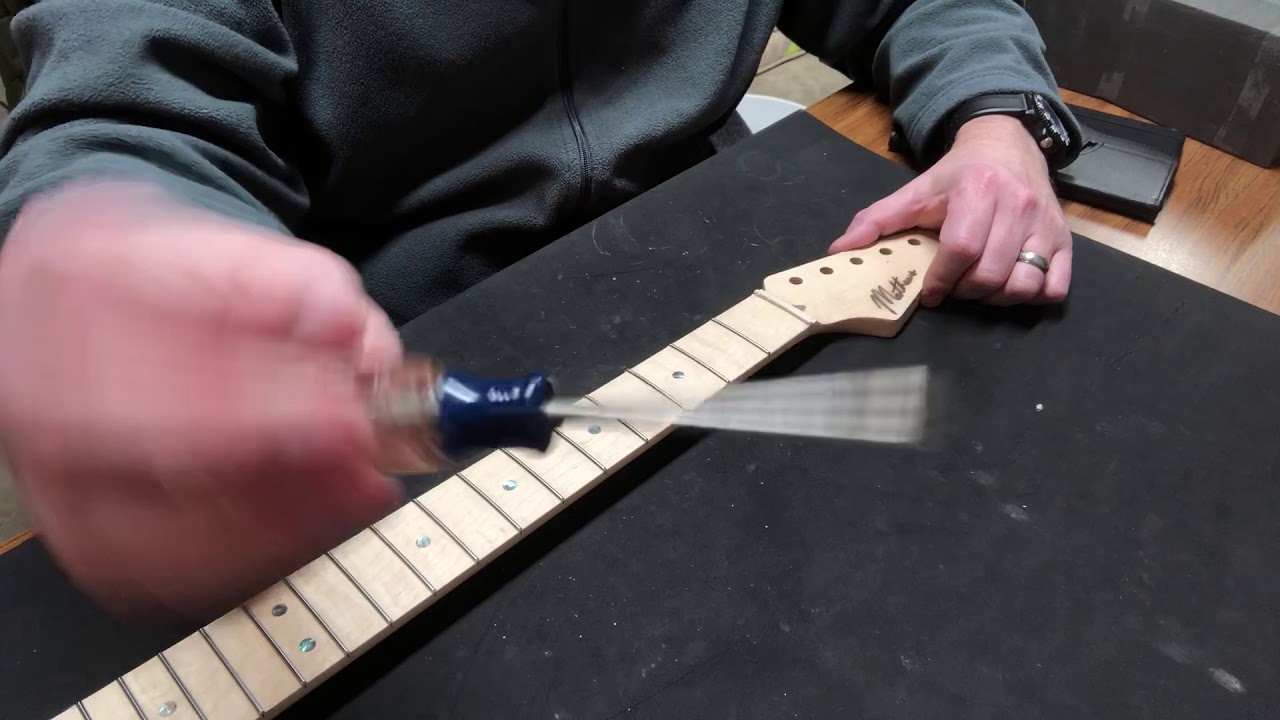
- A Very Smooth, Large Screwdriver (or similar hard, smooth, rounded object): This is your primary tool. The shaft or handle needs to be perfectly smooth – no nicks, burrs, or sharp edges – as it will be directly contacting and compressing the wood. A large, well-rounded Phillips head or flathead screwdriver shaft often works perfectly. You can also use a large, smooth metal rod or a polished bone folder.
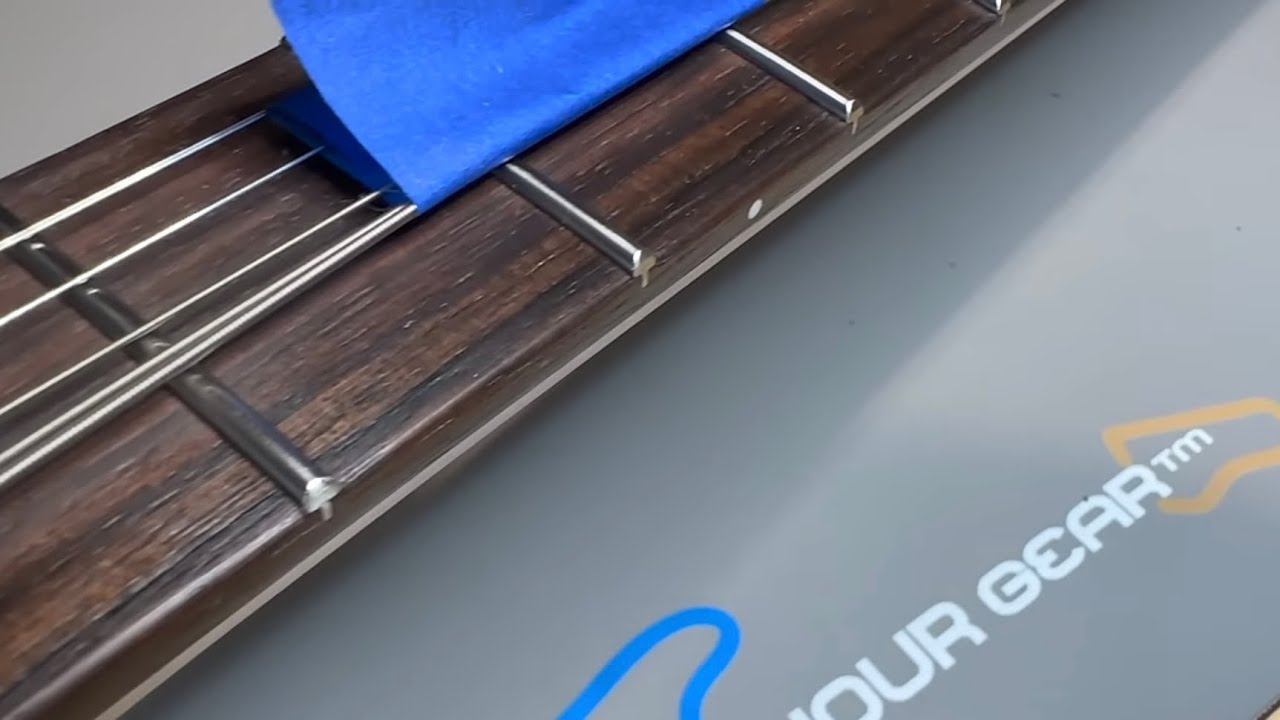
- Soft Cloth: For cleaning and protecting your guitar.
- Super Fine Steel Wool (#0000 grade – Optional): For final polishing, if desired, after the rolling process.
Your Step-by-Step Guide to the Compression Roll
Ready to transform your guitar? Follow these steps carefully for the best results:
Step 1: Preparation is Key
- Remove the Strings: This is essential. You need completely clear, unobstructed access to the entire fingerboard edge, and removing strings prevents any accidental damage.
- Clean the Fretboard: Give your fretboard a good wipe down to ensure it’s free of grime or dust.
Step 2: The Art of the Compression Roll
This is where the magic happens. Patience and consistent pressure are your best friends here.
- Position Your Tool: Take your smooth screwdriver (or chosen tool). Position the long, smooth shank of the screwdriver directly on the sharp corner edge of the fretboard.
- Apply Circular Motion and Consistent Pressure: With firm but controlled pressure, begin moving the screwdriver in a circular motion along the corner. You’re not trying to scrape or dig, but rather to compress and burnish the wood fibers inwards.
- Focus on the Corner: Keep the contact point of the screwdriver precisely on the corner where the top of the fretboard meets its side.
- Work Gradually: Start at the nut end of the fretboard (first fret) and systematically work your way up towards the body of the guitar, rolling the entire length of both edges.
- Maintain Consistency: The key to a professional look and feel is consistency. Apply similar pressure and use a uniform circular motion along the entire edge, from the first fret to the last.
- Feel for Progress: Frequently stop and feel the edge with your thumb and fingers. You should notice the sharp corner gradually becoming softer and more rounded. Does it feel evenly rolled? Are there any spots that still feel sharp? Adjust your pressure and focus on those areas. The goal is a subtle, gradual curve that feels incredibly comfortable.
Step 3: The Final Polish (Optional)
For that extra touch of perfection and a truly luxurious feel:
- Super Fine Steel Wool: Once you’re satisfied with the rolled edges, take a piece of super fine steel wool (#0000 grade) and gently rub it along the newly compressed edges. This will help to further smooth out any microscopic imperfections and leave a beautifully polished, silky-smooth surface.
Important Considerations for a Successful Roll
- Tool Smoothness is Paramount: Ensure your screwdriver or chosen tool is perfectly smooth. Any nicks, burrs, or rough spots on the tool will transfer directly to your fretboard, potentially marring the wood.
- Patience and Light Touch (Initially): While you’re applying pressure, it’s a controlled, consistent pressure, not a forceful gouge. Start with moderate pressure and increase as you get a feel for how the wood responds. You can always apply more pressure, but you can’t undo over-compression easily.
- Go Slow and Check Often: There’s no rush. It’s always better to take your time and check your progress frequently by feel. This method is forgiving because you’re not removing material, but consistency is still key.
- Wood Type: This method works wonderfully on most guitar fretboard woods (rosewood, ebony, pau ferro, etc.). Maple fretboards, especially finished ones, might respond differently. Test on an inconspicuous area if you’re unsure or use very light pressure.
Elevate Your Guitar’s Playability Today!
The compression roll is a fantastic, non-destructive way to give your guitar’s fretboard that coveted “played-in” feel. By investing a little time and using this simple technique, you’ll unlock a new level of comfort and playability, making your guitar feel like a truly custom instrument. So grab your trusty smooth screwdriver, put on some tunes, and get ready to enjoy the ultimate smooth fretboard!


